Post 57: What is a Complete Mechanical Overhaul at Onks Woodwind?

Previously in Post 48 we described why oboe mechanisms are complicated and how the mechanisms wear over time.  We also went on to describe why it’s important to have annual maintenance and the type of service your instrument would receive from our annual cleaning/set-up.

Sometimes, however, it is necessary to overhaul an instrument to bring it back into good playing condition.  The term overhaul can mean different things to different people.  Here is an outline of what your instrument will get with a complete mechanical overhaul at Onks Woodwind.

  • Completely disassemble instrument so we can remove all springs.
  • Clean all posts, rods and hinge tubes so we can fit keys.
  • Mechanically fit all keys on the instrument individually.
    • Fitting keys involves swaging keys tighter onto the rods.
    • Countersinking pivot screws in posts to fit keys that are on pivots.
    • Many times keys/rods are too loose to swag.  When this happens we make new oversized rods to stabilize keys.
    • Postholes themselves can be too large from years of usage.  When this happens we have to rebuild the insides of posts to secure the rod that secures the keys.
    • Post threads can sometimes become loose in the instrument.  When this happens we must re-secure the post into the instrument.
    • Over time braze joints on keys can become weak and split apart.  When this happens we must prep and re-braze the key so it will remain stable and not break in the near future.
  • Remove all corks from the instrument and keys.
  • Remove all pads from pad cups.
  • Clean excess glue from all pad cups.
  • Secure loose metal tenon rings.
  • Ultrasonically clean all keys to prep for buffing.
  • Wash instrument body and posts to prep for buffing.
  • If plating is intact all posts, keys, metal tenon rings, bell ring, reed well, and metal sockets are buffed to a high shine.
  • If plating is not intact keys and posts must be prepped for plating.
    • Plating prep includes filing/sanding keys and posts so all surfaces are smooth.  Many times this includes building up worn away base metal and sanding down layers of plating to be even with the base metal.
    • Once keys have been re-built, all keys and posts are ultrasonically cleaned and buffed to a high shine.
    • Keys and posts are ultrasonically cleaned again after buffing, hand inspected to make sure no buffing compound remains and packaged for shipping to the plating company.
  • Instrument bodywork.   Clean up scratches or previous crack work that need to be touched up.
  • Plug all holes in instrument body to confirm body is airtight.
  • Polish octave vent wells and octave vents.
  • Replace reed well if necessary.
  • Rebuild tenon connections if necessary.
  • All new tenon corks.
  • All new key corks, adjustment, and bumper.
  • Re-install posts. (If they were sent off for plating.)
  • Re-install springs. (We typically only replace springs when they are broken or do not work properly.)
  • Replace all pads during the re-assembly process.
    • As one might imagine, pad replacement is a crucial process.  Pads have to cover tone holes perfectly, but they must also work in harmony with all other pads.  Pad thicknesses are just as important as the pads covering with regards to the mechanisms regulation, pad angles and venting.

All of the procedures above, and more are completed and/or considered while overhauling an oboe or English horn at Onks Woodwind.  Overhauls can take between 20 and 30 hours depending on how much the mechanism, keys and body have deteriorated.

We would be honored to bring your oboe or English horn back to life.   Whether it is your day to day work horse or family heirloom, Onks Woodwind is here for you.  Contact us today!


If you would like to download this information in a printable version, click here.

Post 56: Why we recommend oiling…

The oboe oiling debate will never cease.  I’ve been a member of the double reed community for nearly 30 years at this point, and I have always seen the conversation around whether you should oil or not.  I’m sure there’s some scientific data out there to support or not support oiling, however, the variables involved are so inconsistent that it’s hard to say with certainty one way or the other.  Therefore, most people talk about oiling or not oiling from a personal experience perspective.  This post will be no different, it’s just a conversation with my thoughts on why I do believe in oiling oboes, and clarinets for that matter.

Let’s face facts!  Most of us do certain things and believe in certain methods because our primary teachers believe in them.  We love our teachers!  So, just like I believe in swabbing, I believe in oiling.  My primary teacher, Dr. Dan Ross, believes in oiling and I watched him oil his oboe many times through the years.  I, in turn, oiled my oboe many times through the years while I was a student and then afterward as I moved into being a professional.

The basic reasons I believe in oiling are very simple.  Oiling conditions the wood to help keep it hydrated which, in turn, helps prevent cracking under some circumstances and retains the amazing qualities of the wood for a longer period of time.

I personally played a K series Loree oboe for just over 20 years. I believe, due to the oiling, I never had a crack and the amazing dark timbre of the oboe was retained through the years.  (NOTE:  I oiled the oboe when it was new almost every day for a month.  Every morning I would check it and the oil was gone, “soaked up.”  I continued oiling frequently until the oboe stopped soaking up the oil as much, then I slowed down the frequency even more, etc.  Eventually, I only oiled that oboe a couple of times a year.  I believe the wood will tell you when it needs to be oiled.)

I once heard a story which I believe to be true.  A repairer wanted to dispel the “need to oil” myth.  He took a piece of Grenadilla wood and completely submerged it for two years.  At the end of the two years, he removed the wood and cut it in half.  What did he find?  Those of us that believe in oiling would like for the wood to be soaked, but that was not the case.  He cut the piece of Grenadilla in half and found no oil penetration.  This repairer concluded that oiling is not necessary because the oil does not penetrate deep into the wood.

In my mind, this previous story does not conclude anything, except that Grenadilla will not soak through.  If anything this study helps show that we do need to oil or moisturize our wooden wind instruments.  Imagine if oil cannot penetrate deep into the wood, how fast the wood will dry out without protection.  This is one reason I think we should oil because we need to keep the wood conditioned. Look at any piece of wood that has been cut down from originally being a living tree.  Over time it drys out and breaks down, especially when it is introduced to different temperatures and moisture.  When wood drys out it becomes less dense, therefore losing all its beautiful original “wood” characteristics that you purchased it for in the first place.  Manufacturers know this all too well as they are making instruments with more wood, which makes them heavier, to appeal to players who want a deep dark sound!  More weight or more denseness makes deeper darker sounds.  So to conclude this paragraph, I have found that oiling a wooden wind instrument consistently over time will extend its life regarding tone and potential damage to cracking.

(Side note to oiling and saturation.  If you oiled your oboe and the wood became saturated, the oboe would be unplayable at that point.  Why?  Because we cannot be playing our instruments with oil oozing out all over us, it would also ruin all pads and corks over time.  The only thing we need oozing out of our oboes is beautiful music!  Lol.)

There are a few other ideas I have that I feel are more common sense taken from my observations over the years.  Have you ever “oiled”  furniture?  I grew up seeing my mother and grandmothers oiling their furniture, especially antique furniture.  Why?  Did the oil penetrate deep into the wood fibers?  I can’t say for sure, but I would guess that it did not.  What it did do was add a protective layer of moisture to help prevent the wood from completely drying out.  By not drying out, the wood joints would remain tight over the years, the wood would have minimal shrinkage and/or warpage, and the wood surface would not crack.  This process is done in various ways on all types of woods, really hard dense woods and softer less dense woods, all to achieve the same results of having a beautiful piece of furniture for generations to come.

This next thought has nothing to do with wood, so is probably irrelevant, but I’m gonna mention it anyway.  When our hands become dry, we most likely apply lotion to our hands.  We don’t do this for the lotion to penetrate deep into our tissue then into our bloodstream, but only to condition and moisturize the exterior layer of our skin.  We are conditioning our skin so that it doesn’t dry out, crack or peel.  I find this example to be similar to oiling wood in many ways.  Again it’s not exactly the same as wood, but carries with it the same thought process, application, and results.

Read our Oboe Oiling Procedure here: https://www.onksws.com/2018/10/15/oboe-oiling-procedure/

Click here https://youtu.be/mz4zFshuaB8 to view a video of Jason demonstrating the oiling procedure.

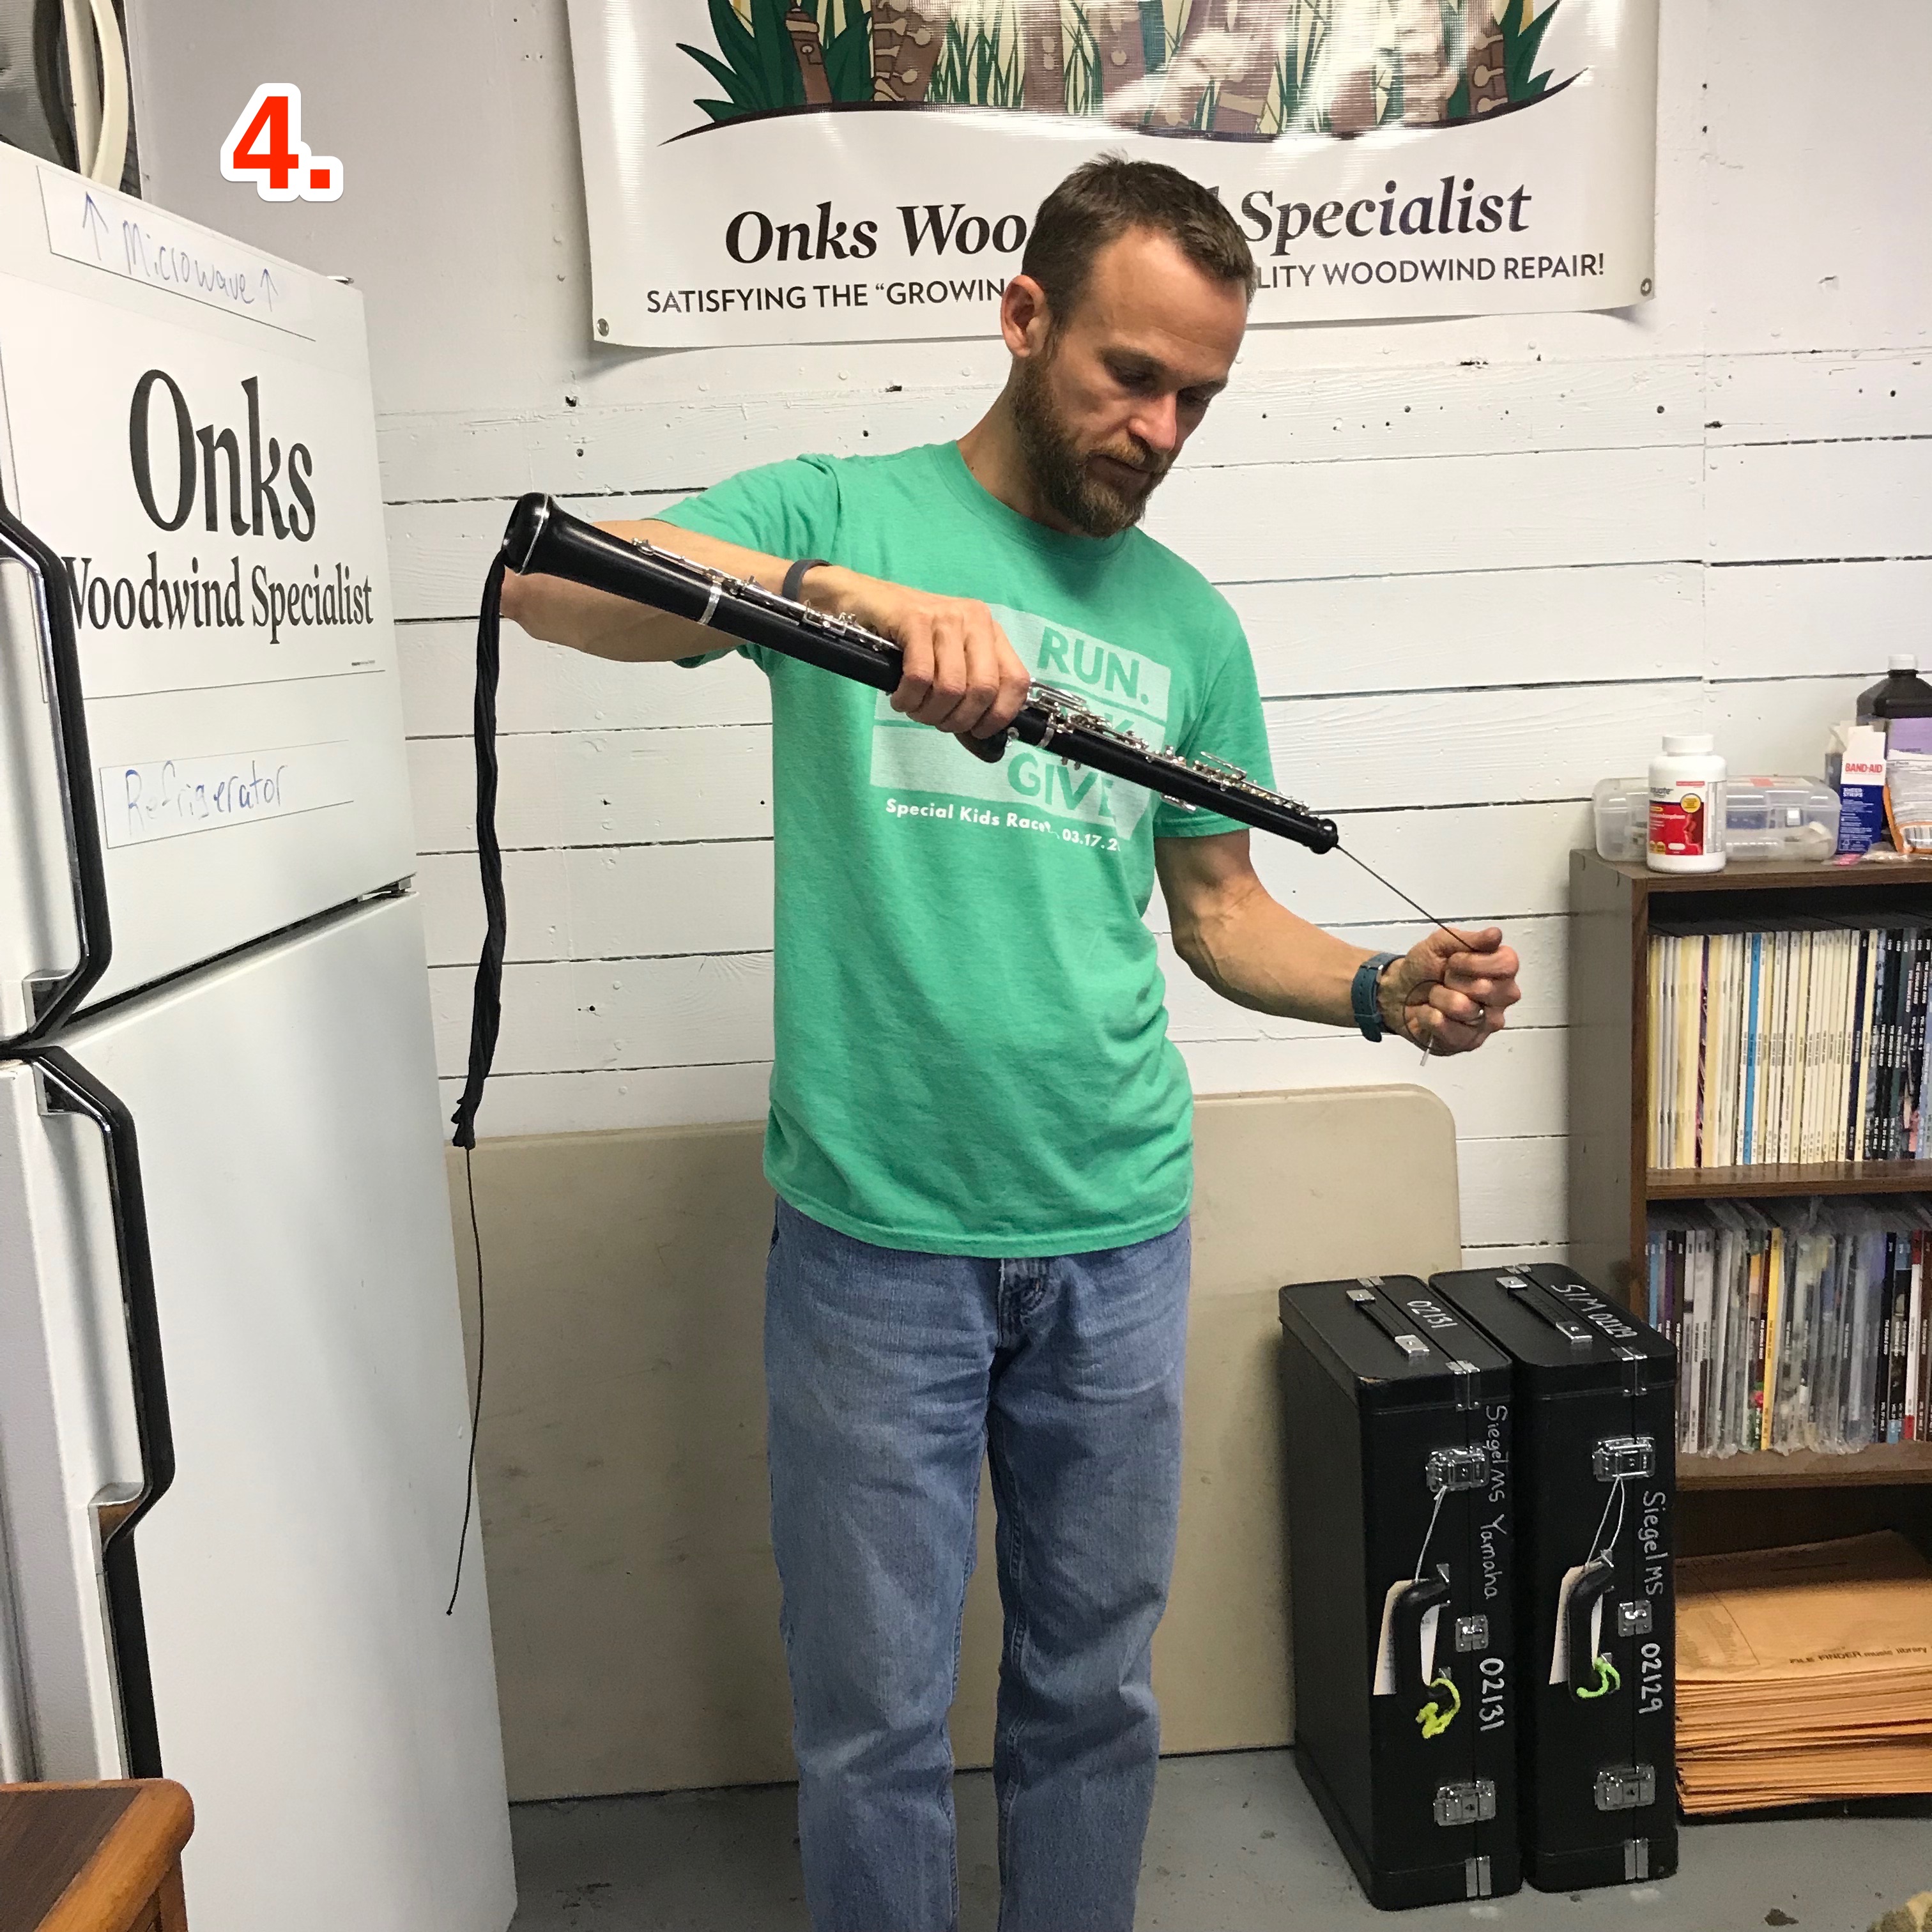
Post 55: Swabbing your Oboe by Numbers

Click on the pictures below to view each step individually.


Other helpful hints:
  • Just like when you are playing your instrument, do not talk to your next door buddy while swabbing.  Most swabbing incidents occur because the swabber is not paying attention.  While swabbing, do not talk to your friends, but focus on the swab and instrument at all times.  Doing this and pulling the swab very slowly will ensure that you have a successful swabbing session.
  • If you do not want to chance getting your swab stuck, another option is to swab your instrument in sections.  Instead of pulling the swab all the way through each section, pull until the swab gets tight then pull the swab back out the same way it went in.
  • Use a non-pull through silk swab for another very safe swabbing method.
  • And of course, you can use a feather instead of a swab to have a successful “swabbing” session.

Post 48: What is an annual cleaning/set-up at Onks Woodwind?

“The mechanisms of an oboe and English horn are so complicated!” So who of you out there can agree with that statement? OK, I thought so. BTW, I also raised my hand. They are indeed complicated for many reasons. Oboes have many keys that interact with each other all at the same time. Oboes have many adjusting screws throughout the mechanism that connects one key to another. Oboes have joints that connect together with connecting bridge keys. All of the keys on an oboe are held in place with steel rods and/or pivot screws and said keys have to be “tight” on those rods/pivot screws to operate consistently. These few items all have to do with the mechanism, but there is so much more: tone holes, corks, springs, pads, octave vents, tenon connections, screws, rods, mechanism key oil, etc. As with any musical instrument, all of the parts must be in working order to make you, the player, happy, but as you can see, the oboe has many pieces and parts and can be very complicated.

Every week we have oboes come in with only “one thing wrong,” or “it plays well, but can you just check it over.” When our clients say these phrases, we tell them we will check it out and let them know our thoughts and recommendations. It isn’t that our clients are completely oblivious to the issues their oboe is having, it’s just that they have gotten accustomed to it over time and the parts of the oboe have worn down over time. This is very similar to cars and car repairs. If you drive your car very much, you will need to have maintenance on the brake system and eventually the pads will need to be replaced. The same thing is true with oboes. The longer you play your oboe, the harder you press the keys, the more the pads in those keys will wear out. Also, all of the connecting corks will wear through causing mechanisms to become loud and adjustments unstable. Because the oboe mechanism is so complicated, it makes the task of “fixing just one thing” very difficult. If your low notes are not responding like you prefer, it very well could be due to a pad or pads leaking on the upper joint of the oboe. Spring tensions could be wrong causing certain keys to not operate properly, etc

Due to this complexity, we recommend you have a full comprehensive cleaning/set-up in our shop at least once a year. So I know by this point you are asking, “What is included in this full comprehensive cleaning/set-up?” At Onks Woodwind Specialists we:

* Completely disassemble the instrument.
* Check tenon connections for stability, which is more than just checking the tenon corks.
* But we do check the tenon corks also 🙂
* Check all key bumper corks and adjustment corks. We usually change all of the adjustment corks on oboes vs. just changing one cork here and there because we have found it makes the overall feel of the mechanism more even and stable. Plus with all of the keys off the oboe, it’s a no-brainer! Takes only a couple minutes and makes the mechanism feel great!
* Clean all hinge tubes and pivot sockets.
* Clean all rods and pivots.
* Clean all post holes and facings.
* Clean all tone holes and oboe body to break down saliva build-up.
* Wash body and oil, if wood.
* Before reassembling, we test wooden instruments to make sure the wood seals. This is especially important if the instrument has crack history. If the wood doesn’t seal we remedy that before reinstalling any keys.
* Reassemble the mechanism one key at a time checking each pad for optimal coverage. If the pad is leaking we level the pad. If the pad cannot be leveled, we replace the pad and if the key is too loose, we fit the key.
* As we are reinstalling keys, all springs are regulated to have proper tensions, which is critical for the complicated oboe mechanism.
* As more keys are added and pads checked, the regulations are also added.
* All rods and pivot screws are oiled with a heavy weight synthetic oil.
* Reassemble all three joints of the oboe, regulate the joints together and perform our first of many play tests.

As you can see the annual cleaning at Onks Woodwind is thoroughly comprehensive. And honestly, these items are only the highlights. There are many other small details that as oboists we pay attention to and can “feel” as we playtest the oboe. We have found over the years that when our clients have a thorough cleaning/set-up at Onks Woodwind, they magically do not have emergencies between annual visits!

If you are an oboist that simply wants their oboe to work and not have to worry when it’s going to malfunction “the next time,” we would be honored to serve you with our comprehensive annual cleaning/set-up.


If you would like to download this information in a printable version, click here.

Post 47: Remove, Clean and Re-install Oboe Octave Vents

Here in the professional oboe repair shop, we are frequently asked about cleaning and sealing octave vents.  The standard questions are: How often should I clean the octave vents?  What’s the best way to clean octave vents?  Should I seal octave vents?  How do I seal octave vents?

To answer how often, it really depends.  I know, I know, you’re saying, “Thanks a lot for the great advice, Jason!”  It really does depend on how often you play, how much you swab/feather out your oboe, and the environment in which you play.  At a minimum, we recommend having your octave vents cleaned once a year.  This would also go hand-in-hand with a full service for your entire oboe.  Oboes have complicated, temperamental mechanisms and should receive a full service once a year.  See our articles post 3 “Maintain on a yearly basis” and post 4 “Maintain on a yearly basis, Part 2.”  However, if you are a professional oboist playing 6-8 hours a day or more, it may be necessary for you to clean your octave vents several times a year, before your next annual full service.  

No matter your age or level of playing, it may be necessary for you to clean your octave vents at some point in the future.  I feel it is especially important for you to have this knowledge if you are a studio teacher, either at your residence or a university setting.

Previously we posted blog post 33, Should you seal your octave vents?  You may also find this article helpful when trying to answer questions about octave vents.

To help assist you with this necessary task of removing, cleaning and sealing octave vents, we created a couple of videos and posted them on our YouTube channel: